我曾多次萌生过写博客的想法,后来都不了了之。想写博客,却又觉得搭建博客太过麻烦,一直没做成这件事。
最后终于下定决心去尝试,于是便有了这个博客。本文主要介绍一下搭建博客的过程,利用 Pelican 和 GitHub Pages 从零开始搭建博客。
Pelican 是一款用 Python 编写的静态网站生成工具,可以将Markdown,Jupyter Notebook等文件转换为静态 Html 页面,并且生成与这些页面匹配的 css 等组件,组成一个完整的静态网站。将静态网站提交到 GitHub,利用 GitHub 上的 GitHub Pages 功能,即可在互联网公开发布个人博客。
系统要求
- Python环境(最好anaconda)
- Git
安装Pelican与必要依赖
新建一个虚拟环境专门用于博客搭建,由于我使用 anaconda,所以直接新建 anaconda 环境,如果是纯 Python 可以使用 virtualenv 新建环境。
当然如果不担心包版本之间的冲突,也可不新建虚拟环境。
conda create --name pelican python=3.6
之后的操作如无说明都在 pelican 这一环境下执行的
source activate pelican
安装 pelican 和必要的依赖
pip install -r requirements.txt
requirements.txt 文件内容如下
pelican==3.6.3
Markdown==2.6.6
jupyter>=1.0
ipython>=4.0
nbconvert>=4.0
beautifulsoup4
matplotlib
新建Pelican项目
新建一个文件夹,比如就叫 Blog吧,用于存放博客文件
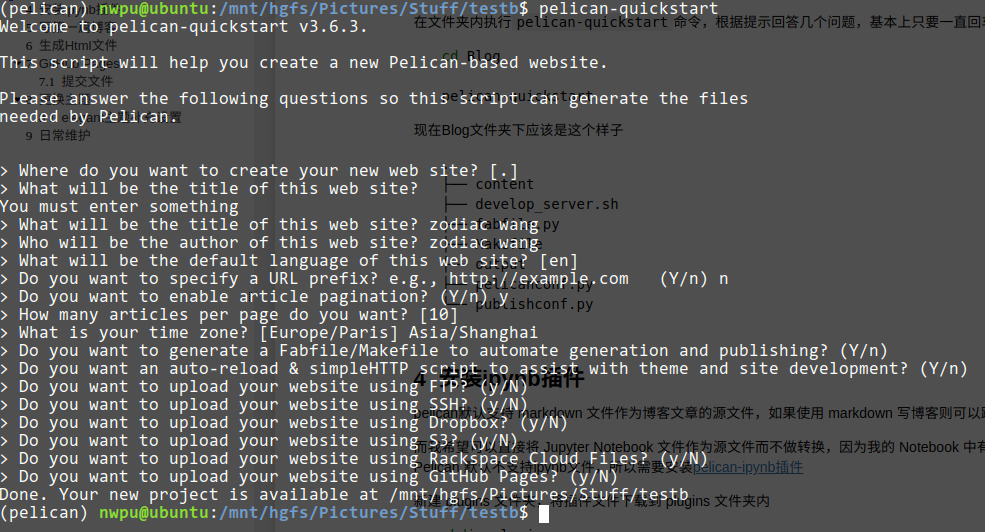
在文件夹内执行pelican-quickstart命令,根据提示回答几个问题,基本上只要一直回车就可以了
cd Blog

pelican-quickstart

现在 Blog 文件夹内应该是如下结构
.
├── content
├── develop_server.sh
├── fabfile.py
├── Makefile
├── output
├── pelicanconf.py
└── publishconf.py
其中 pelicanconf.py 和 publishconf.py 是主要的配置文件,其中publishconf.py 只在特殊指定时才有效如执行如下语句时
pelican content -s publishconf.py
而 pelicanconf.py 为核心配置文件始终有效
两个文件默认内容分别如下
pelicanconf.py
#!/usr/bin/env python
# -*- coding: utf-8 -*- #
from __future__ import unicode_literals

AUTHOR = 'zodiac wang'
SITENAME = 'zodiac wang'
SITEURL = ''

PATH = 'content'

TIMEZONE = 'Asia/Shanghai'

DEFAULT_LANG = 'en'

# Feed generation is usually not desired when developing
FEED_ALL_ATOM = None
CATEGORY_FEED_ATOM = None
TRANSLATION_FEED_ATOM = None
AUTHOR_FEED_ATOM = None
AUTHOR_FEED_RSS = None

# Blogroll
LINKS = (('Pelican', 'http://getpelican.com/'),
         ('Python.org', 'http://python.org/'),
         ('Jinja2', 'http://jinja.pocoo.org/'),
         ('You can modify those links in your config file', '#'),)

# Social widget
SOCIAL = (('You can add links in your config file', '#'),
          ('Another social link', '#'),)

DEFAULT_PAGINATION = 10

# Uncomment following line if you want document-relative URLs when developing
#RELATIVE_URLS = True
publishconf.py
#!/usr/bin/env python
# -*- coding: utf-8 -*- #
from __future__ import unicode_literals

# This file is only used if you use `make publish` or
# explicitly specify it as your config file.

import os
import sys
sys.path.append(os.curdir)
from pelicanconf import *

SITEURL = ''
RELATIVE_URLS = False

FEED_ALL_ATOM = 'feeds/all.atom.xml'
CATEGORY_FEED_ATOM = 'feeds/%s.atom.xml'

DELETE_OUTPUT_DIRECTORY = True

# Following items are often useful when publishing

#DISQUS_SITENAME = ""
#GOOGLE_ANALYTICS = ""
安装ipynb插件
pelican默认支持 markdown 文件作为博客文章的源文件,如果使用 markdown 写博客则可以跳过这一步。
而我希望可以直接将 Jupyter Notebook 文件作为源文件而不做转换,因为我的 Notebook 中有很多代码及其生成的结果。但 Pelican 默认不支持ipynb文件,所以需要安装pelican-ipynb插件
新建 plugins 文件夹,将插件文件下载到 plugins 文件夹内
mkdir plugins
cd plugins
git clone https://github.com/danielfrg/pelican-ipynb
修改 pelicanconf.py 文件,在最下边添加几行代码,激活插件
MARKUP = ('md', 'ipynb')

PLUGIN_PATH = './plugins'
PLUGINS = ['pelican-ipynb.markup'] #pelican-ipynb 为添加的submodule文件夹名
IGNORE_FILES = [".ipynb_checkpoints"] # 如果有ipynb_checkpoints文件添加这一行以忽略
pelican-ipynb 插件具体配置方法有好几种,详见项目Readme,我使用的是推荐配置方法。
写第一篇博客
是时候写第一篇博客了。
将用Pelican+GitHubPages搭建静态博客.ipynb复制到content文件夹,并新建一个同名nbdata文件,用于保存额外的文章信息,内容如下
Title: 用Pelican+GitHubPages搭建静态博客
Slug: static-blog
Date: 2018-10-03 09:20
Category: posts
Tags: blog,pelican,ipynb
Author: Zodiac Wang
Summary: 本文介绍如何搭建静态博客
相应字段的含义:
- Title——文章标题
- Slug——文章在服务器上的路径,如 slug 是 first-post,而博客地址是 jupyter-blog.com, 则文章地址为 http://www.jupyter-blog.com/first-post
- Date——文章发布日期
- Category——文章的类别——可以是任何东西
- Tags——文章的标签
- Author——作者名字
- Summary——文章摘要
现在Blog文件夹下结构应该是这个样子
.
├── content
│   ├── 用Pelican+GitHubPages搭建静态博客.ipynb
│   └── 用Pelican+GitHubPages搭建静态博客.nbdata
├── develop_server.sh
├── fabfile.py
├── Makefile
├── output
├── pelicanconf.py
├── plugins
│   └── pelican-ipynb
│       ├── core.py
│       ├── __init__.py
│       ├── ipynb.py
│       ├── LICENSE
│       ├── liquid.py
│       ├── markup.py
│       ├── README.md
│       ├── requirements.txt
│       └── tests
└── publishconf.py
生成Html文件
切换到Blog文件夹下,生成Html文件
pelican content -s publishconf.py
切换到output文件夹下,开启本地服务器
python -m pelican.server [port]
在浏览器输入localhost:[port]预览博客,默认端口为 8000
GitHub Pages
以上只是在本地生成了一个网页服务,要想让博客出现在互联网上,有两类方法
- 自己租 VPS 并申请域名,让后将博客放到 VPS 上自己搭建的网页服务上并绑定申请的域名
- 利用 GitHub Pages 或者其他类似服务,将静态网站托管到上面
我选择将博客托管到 GitHub 上。
首先在 GitHub 上新建一个名为zodiac911.github.io的仓库,GitHub 就会自动在 https://zodiac911.github.io 展示仓库内的静态页面,zodiac911替换为自己的用户名。
提交文件
在output文件夹新建Git仓库,并绑定远程GitHub仓库地址。
如果Blog文件也需要管理,可以将output仓库作为子摸块添加到上层仓库中
cd output
git init
git remote add origin https://github.com/zodiac911/zodiac911.github.io
提交文件并push到远端
git add -A
git commit /
git push origin master #提交文件
这里很多人会推荐使用一个叫作ghp-import的包,用于将output文件夹的内容提交到Blog文件夹内仓库的master分支,但我是直接将output作为一个仓库绑定到zodiac911.github.io仓库,并将这一仓库添加为Blog文件夹下仓库的子模块
更换主题
经过以上设置,就可以在https://zodiac911.github.io看到自己的博客了,不过主题为 Pelican 的默认主题,个人觉得不是很好看,所以换了一个。
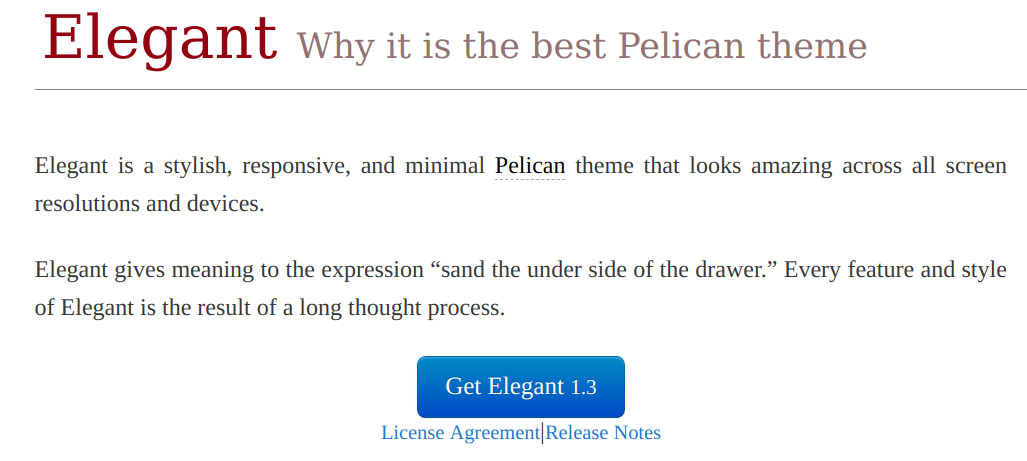
从 pelican-themes 找一个主题下载到themes文件夹并在设置文件中指出主题的路径,我选择的是 pelican-elegant
mkdir themes
cd themes
git clone https://github.com/talha131/pelican-elegant
为使新主题生效,在pelicanconf.py 文件,添加一行代码:
THEME = "themes/pelican-elegant"
elegant主题补充设置
为了获取完全体的 elegant 体验,需要额外安装几个插件,安装方法即直接 git clone 对应的仓库到 plugins 文件夹
这些特性主要包括
- sitemap
- tipue_search
- extract_toc
- neighbors
默认启用不需要额外插件的特性大致如下
- Disqus
- Google Analytics
- MailChimp Integration.
- Custom 404 Page.
- Collapsible Comments
- Page and Article Subtitle.
修改 pelicanconf.py 中相应参数,以激活插件
PLUGINS = ['pelican-ipynb.markup', 'sitemap', 'tipue_search', 'extract_toc']
一些可选的额外设置
RECENT_ARTICLES_COUNT (integer)
COMMENTS_INTRO ('string')
SITE_LICENSE ('string')
SITE_DESCRIPTION ('string')
EMAIL_SUBSCRIPTION_LABEL ('string')
EMAIL_FIELD_PLACEHOLDER ('string')
SUBSCRIBE_BUTTON_TITLE ('string')
MAILCHIMP_FORM_ACTION ('string')
SITESUBTITLE ('string')
LANDING_PAGE_ABOUT ({})
PROJECTS ([{},...])
文章 metadata 中的额外设置项
subtitle
summary
disqus_identifier
modified
keywords
日常维护
每次写了新博客之后,只需要执行以下命令
pelican content -s publishconf.py
cd output
git add -A
git commit -m /
git push origin master
可以写个脚本执行以上步骤
References:
- Building a Data Science Portfolio: Setting Up a Blog
- pelican-themes
- pelican-plugins
- Customizing Pelican blog with the help of Plugin and themes 博客还有几篇处理 elegant theme 小问题的博文也非常不错
- Elegant - Technical Nitty-Gritty 官方文档设置项
- onCrashReboot 官方参考Repo